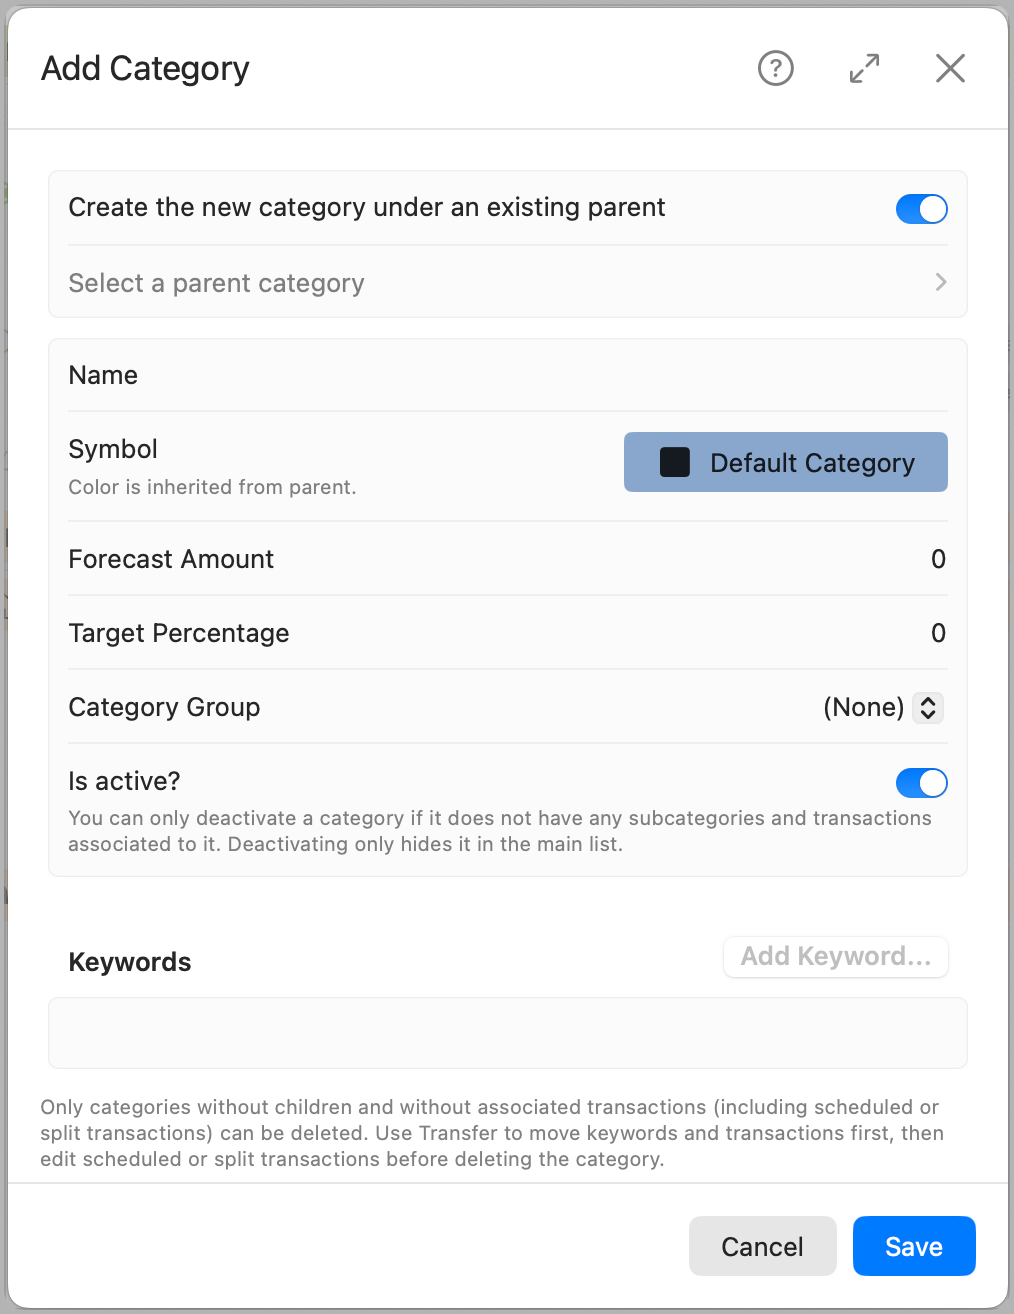
Add Category
When adding a new category, you have two options: create it as a top-level category or as a child under an existing parent. Top-level categories represent broad groups like Income, Fixed Expenses, or Savings, while child categories allow you to organize related subcategories beneath them—for example, placing Rent, HOA Fees, and Utilities under Housing.
Creating a category under a parent keeps your budget organized and allows you to group transactions for better analysis. The parent category passes down its type (Income, Expense, or Ignored) and color to its children. If you choose not to use a parent, the new category will be created at the top level, giving you full control over all properties.
Create under an existing parent
When creating a category under an existing parent, it inherits the parent’s color and type. You can choose any parent category from the list to define the hierarchy.
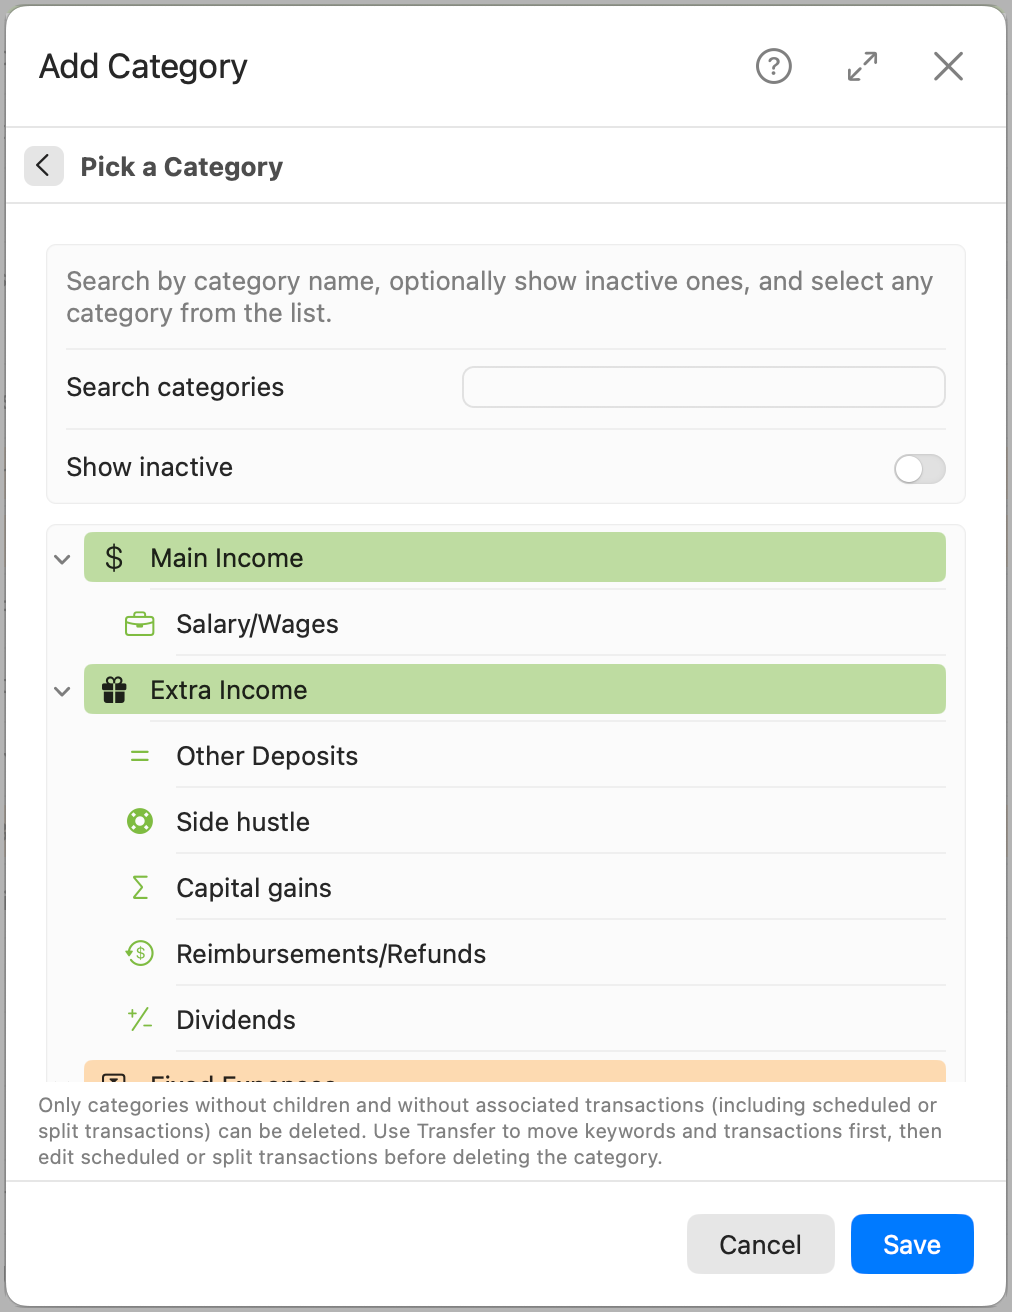
When you click Select a parent category, the panel slides left to display the full category hierarchy. You can choose any category as the parent. Once selected, the view automatically returns to the main properties panel, showing the selected category and its parent, if applicable. If the selected category isn’t currently a parent—such as a subcategory—it will be treated as one after you save. You can also search and choose to show inactive categories. If you select an inactive category, it (along with any inactive parents) will be reactivated before saving.
Note: To keep things clear and manageable, try to limit the hierarchy to around three levels deep.
Name: Enter a name for the new category. This is how it will appear throughout the app—in transactions, budget tables, charts, and reports.
Symbol: Choose a symbol to visually represent the category. Symbols are especially useful in condensed views or charts. Color is inherited from the parent and cannot be changed here.
Forecast Amount: Enter a default forecast value for this category. This value will be pre-filled in the budget table and used to compare against actual totals for the selected period. On parent categories, this value is automatically calculated.
Target Percentage: Define a target percentage for this category, especially if you're using Budget Goal systems like 50/30/20 or 80/20. This may help you further breakdown the goals to individual categories. The app will track and show how close your actual spending comes to this target.
Budget Goal: Assign the category to a goal, such as "Needs", "Wants", or "Savings". These goals help break down spending in the Total by Budget Goal chart. This is optional.
Is active?: Toggle whether the category is active. Inactive categories are hidden from views like the budget table and category list, but they are not deleted. You can only deactivate a category if it has no subcategories and no transactions associated with it.
Keywords
Keywords are optional but powerful when using imported transactions. Keywords, or search phrases, are matched against transaction descriptions to automatically assign them to this category.
Add Keyword
Click Add Keyword to associate a keyword or phrase with this category. Once Keywords are added, they can be edited or deleted.
Note: Keywords must be unique and cannot be a subset of another keyword. Similarly, phrases must not contain any existing single-word keyword. This prevents overlap and ambiguity during automatic classification. If such scenarios occurs, the app will display an error.
Create at the topmost level
If you prefer not to nest the new category under an existing one, you can create it at the topmost level. Top-level categories serve as primary groups in your budget structure—like Main Income, Fixed Expenses, or Savings—and give you full control over their properties, including color, symbol, and type.
These categories can later act as parents to other subcategories, helping you build a flexible and organized hierarchy as your budgeting needs evolve.

Name: Provide the category name, as it will be displayed across the app.
Symbol & Color: Choose a symbol and a color. These will be used in charts and lists to help visually differentiate the category. Unlike subcategories, top-level categories can define their own color, which will be used in all their children.
Income, Expense or Ignored: Select the category type:
- Income (+): Used to group and track income sources.
- Expense (-): Used for all spending categories.
- Ignored: Transactions assigned to this category are excluded from budget calculations and reports.
Is active?: Toggle whether the category is active. Like subcategories, a top-level category can only be deactivated if it has no subcategories or associated transactions.
Edit or Delete Keywords
It's not common to add keywords when first creating a category, but if you do, you can edit or delete them by clicking the pencil or the “X” icon next to each keyword in the list.
Note: Keywords linked to existing transactions should typically be transferred before deletion to prevent leaving future transactions uncategorized. However, since this is a new category with no associated transactions yet, you can edit or remove keywords freely without any concern.