Transactions
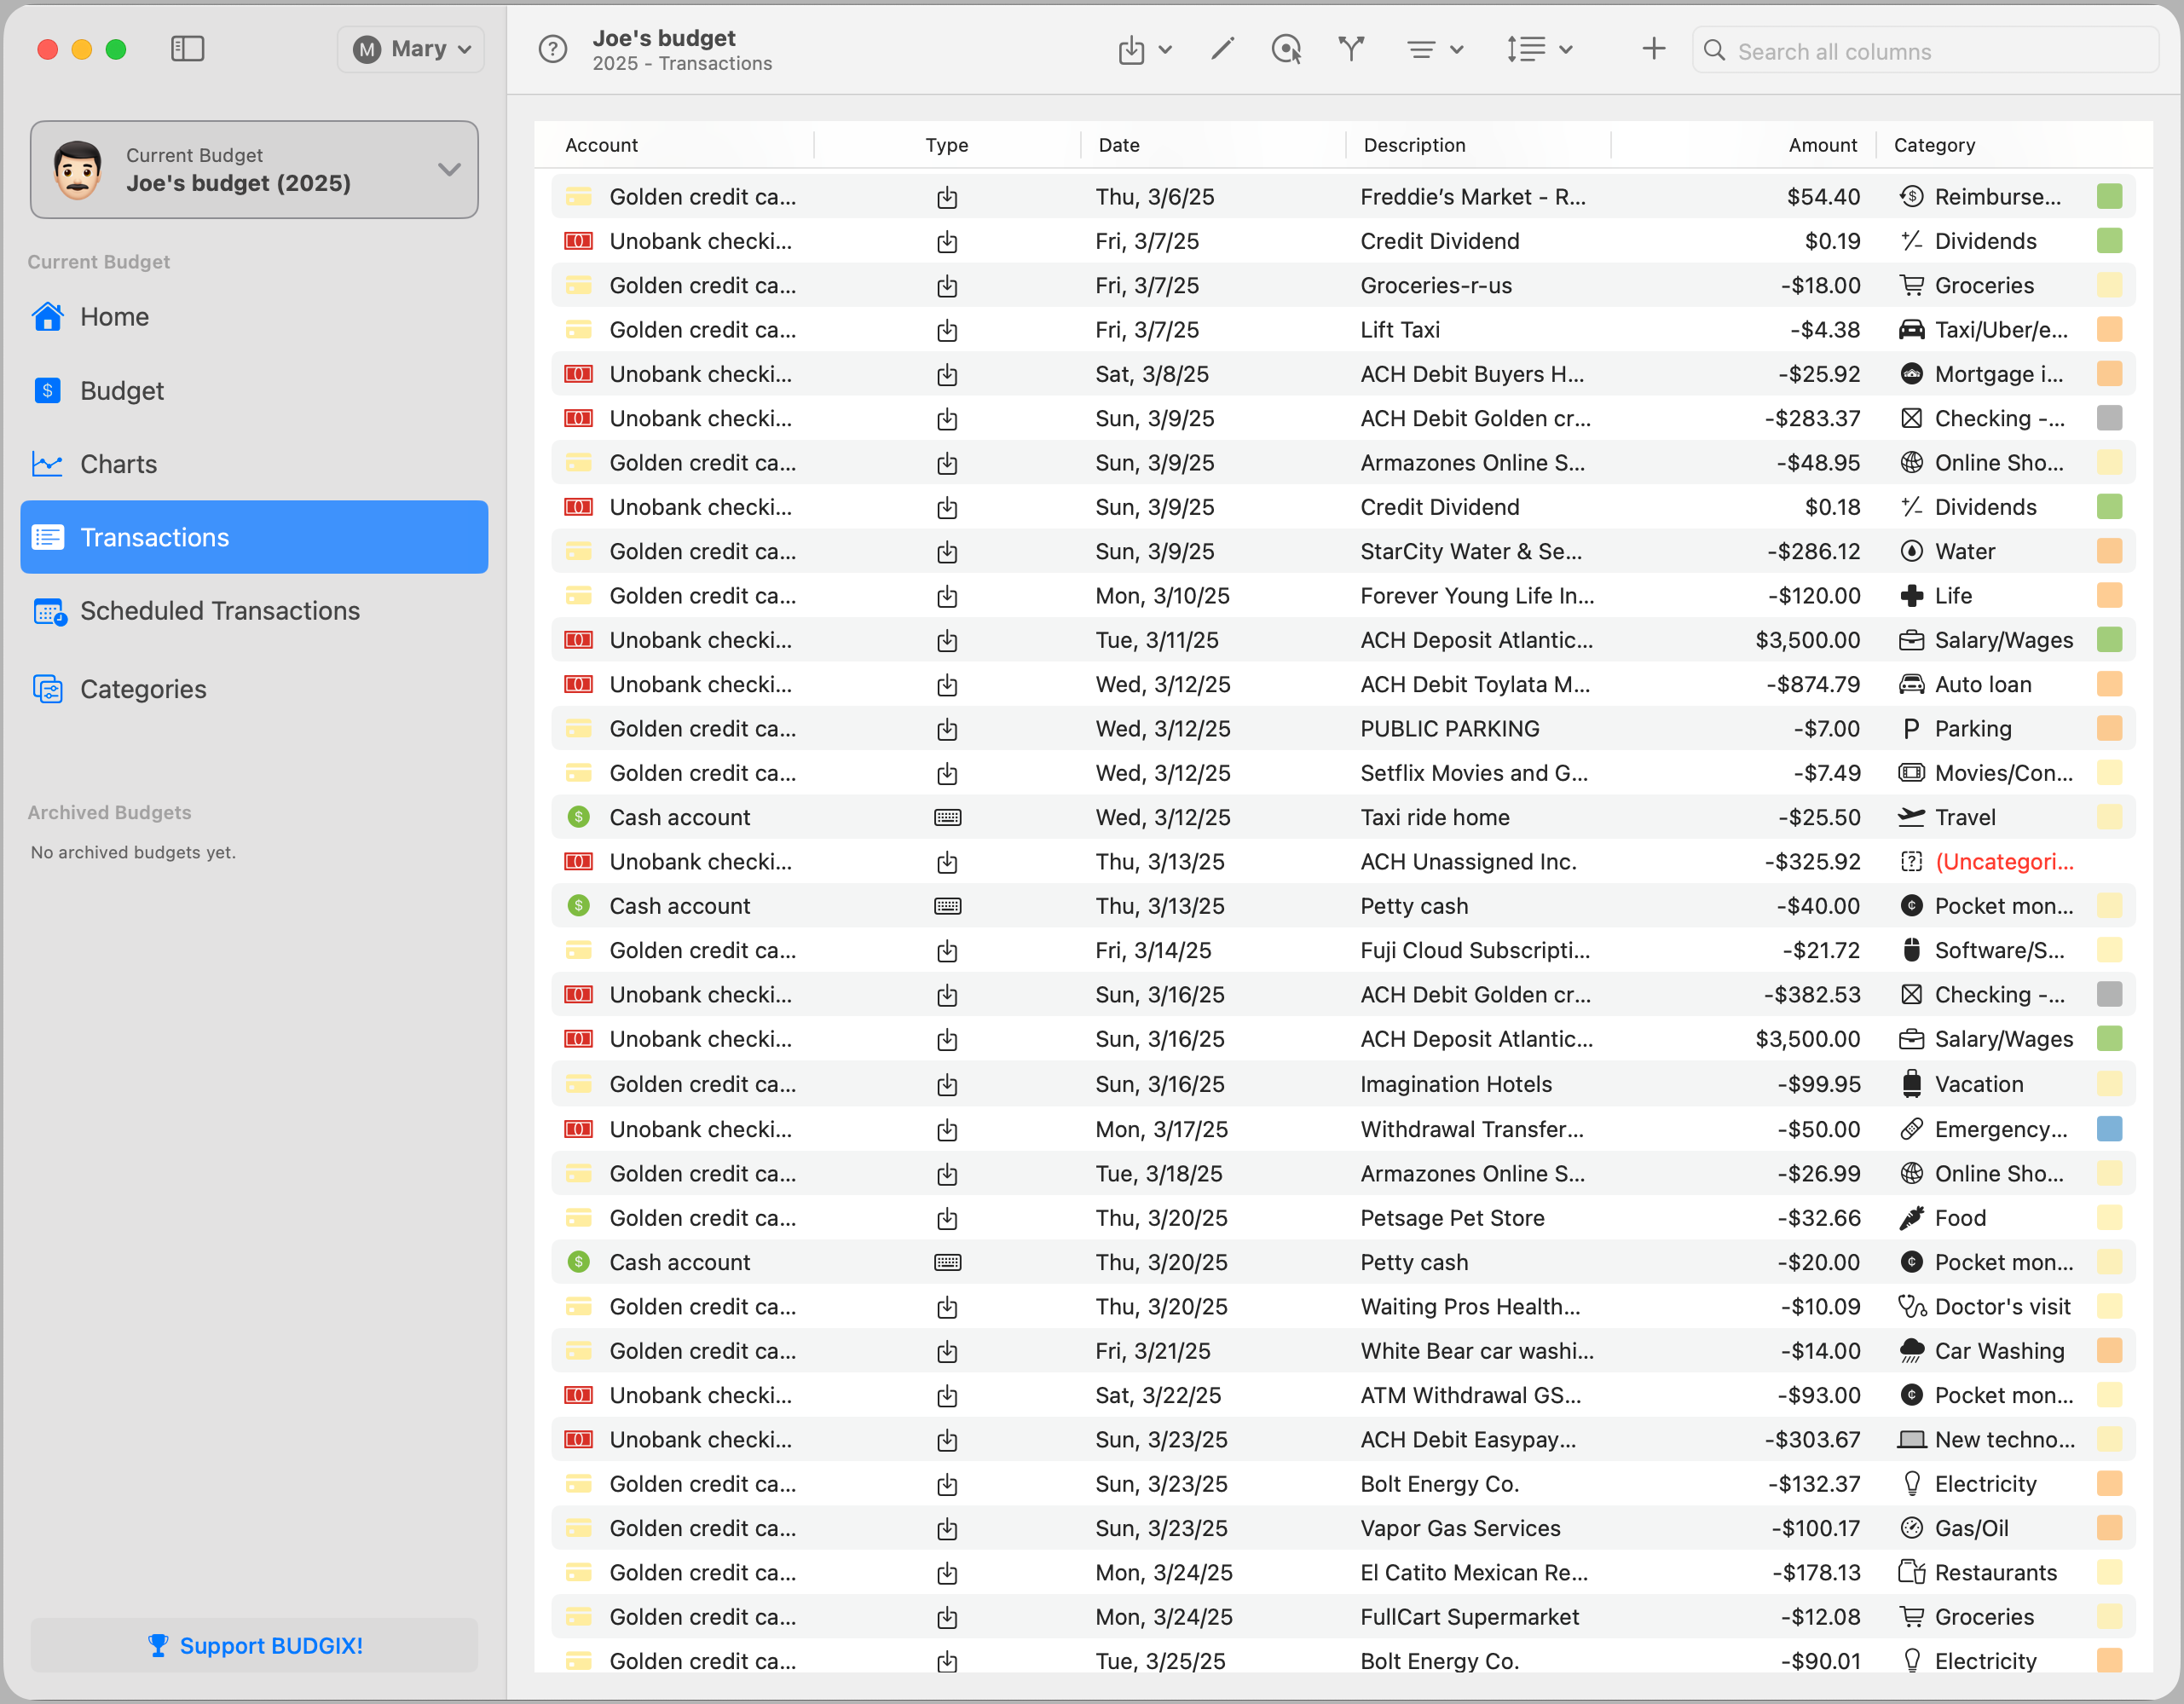
The Transactions screen is where all of your recorded activity is displayed. This includes manual entries, imported bank transactions, and auto-generated transactions from your schedules. You can view, filter, search, sort, edit, or categorize transactions all from this central list.
Each row displays the transaction's account, type, date, description, amount, and assigned category. Color-coded tags and icons help you quickly scan for key information.
Toolbar
The toolbar offers a variety of tools for importing, editing, filtering, organizing, and adding transactions.

Import
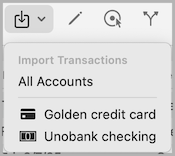
Use the import menu button to bring in transactions from external sources. The dropdown lets you import for all available accounts, choose a specific account to import into, or define the auto-import schedule. For more details, see the Manage Auto-Import section.
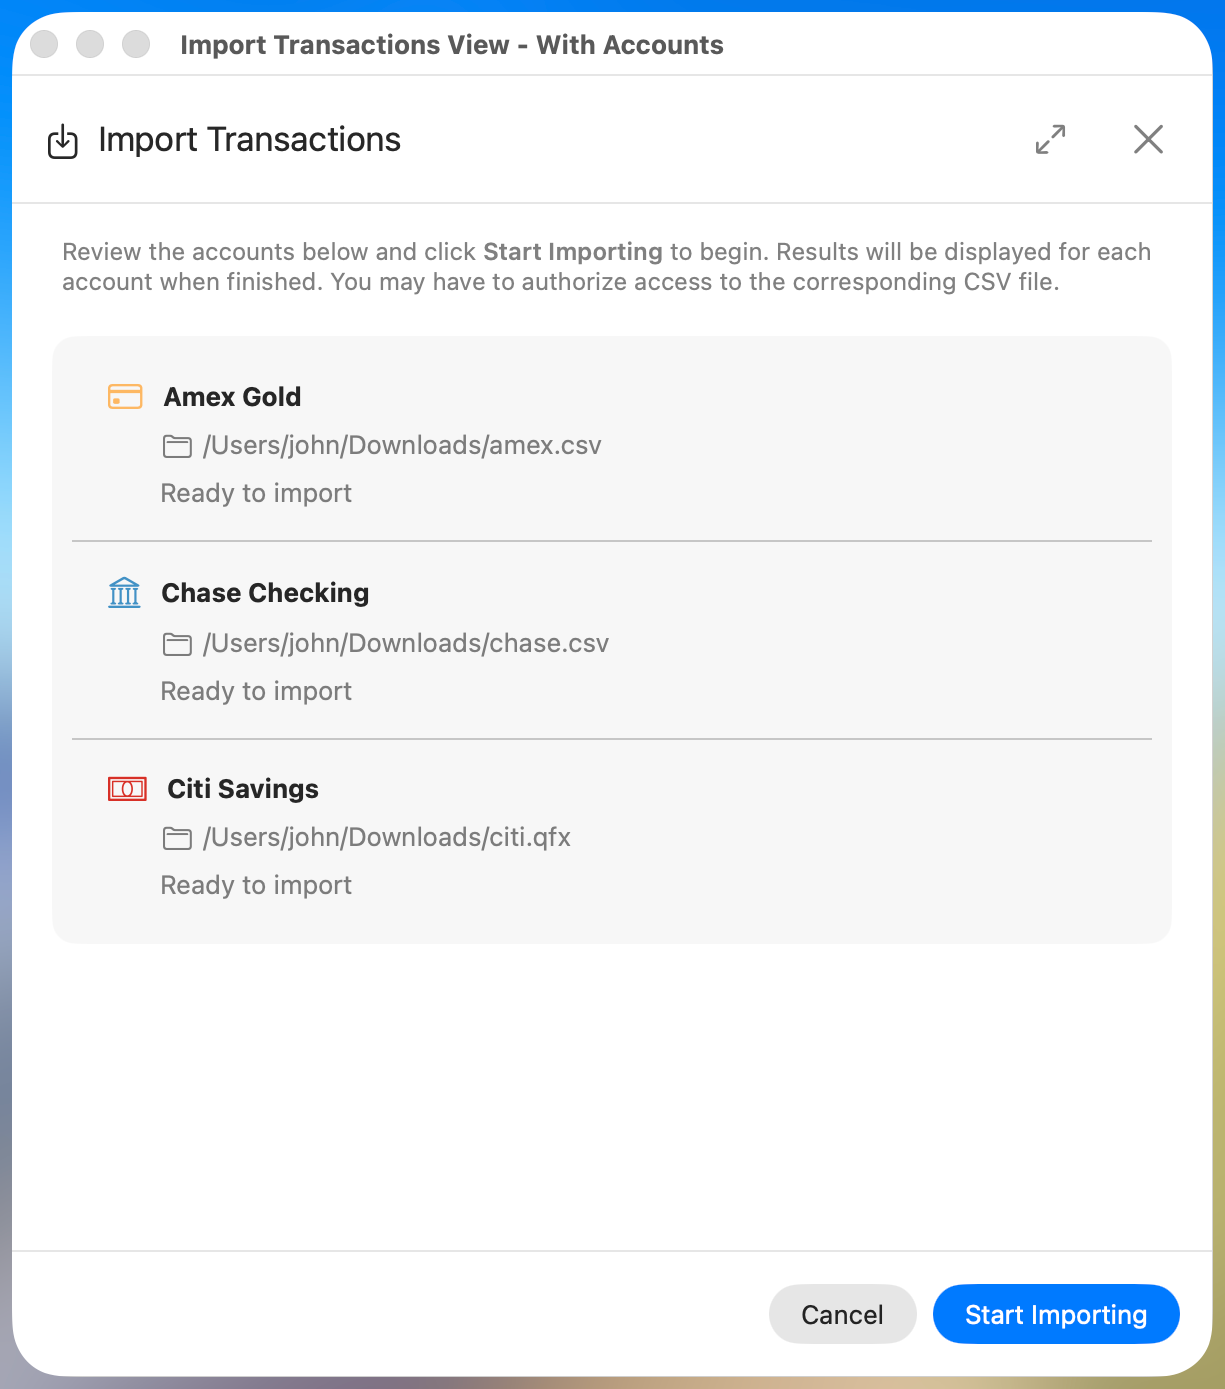
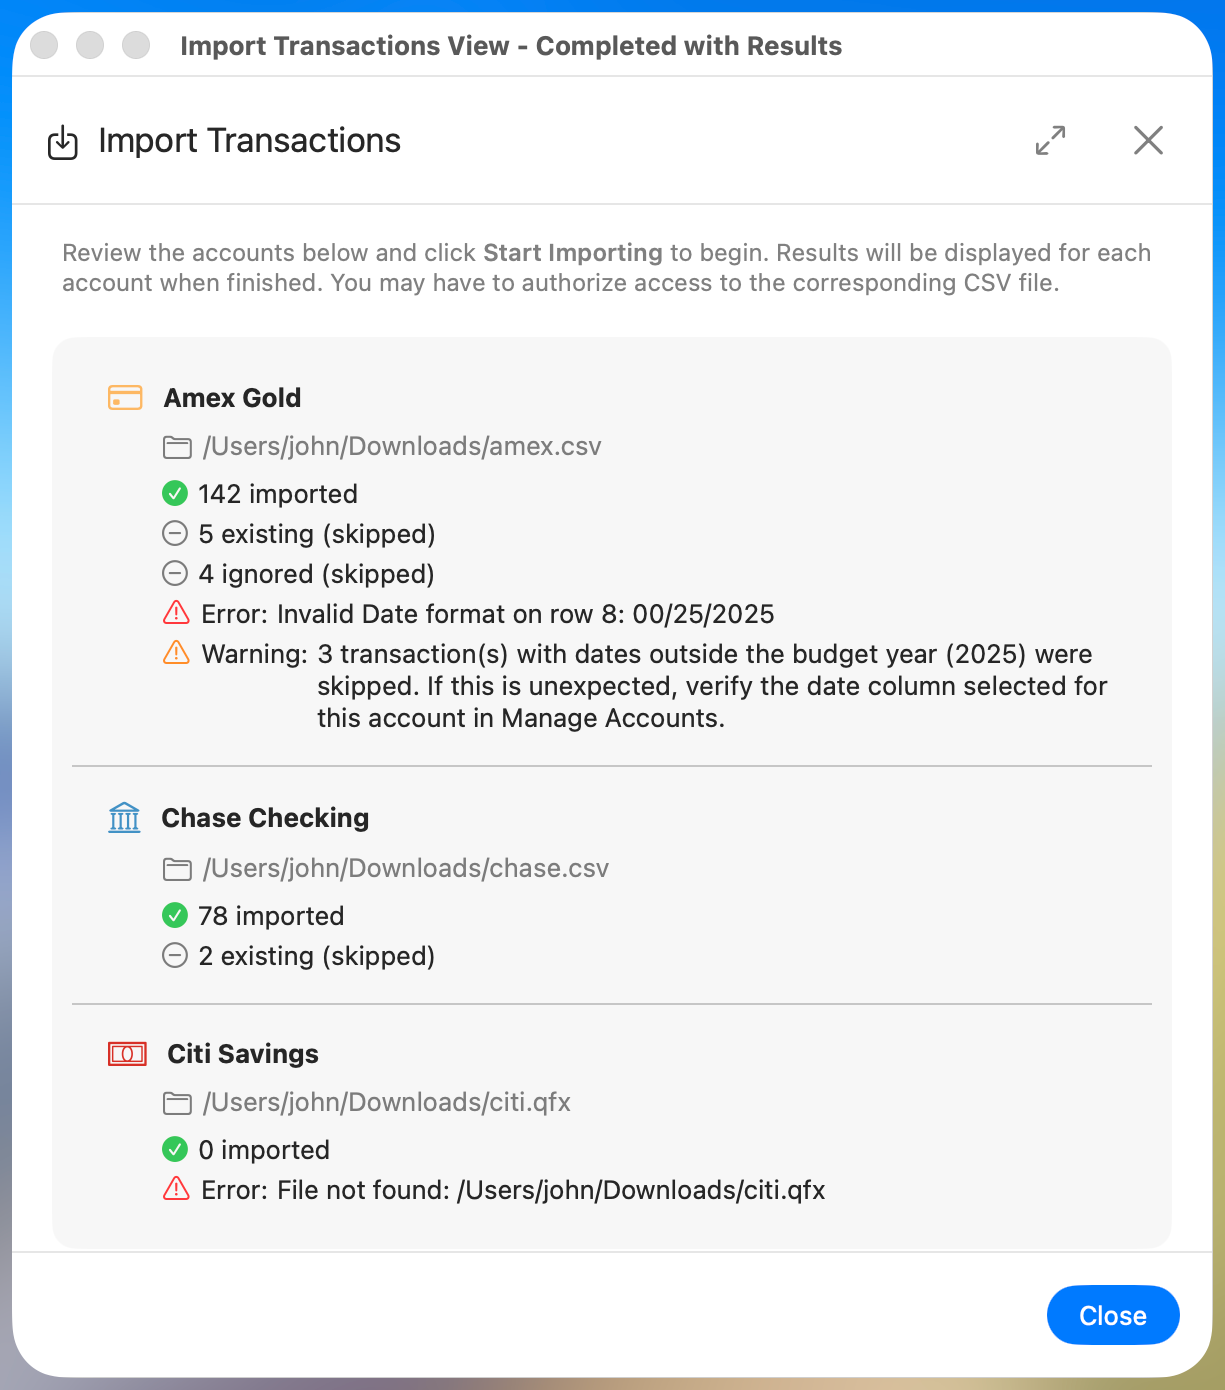
You can import using supported formats (like CSV or OFX/QFX), and the app will attempt to match transactions based on date, amount, and description. Import file paths are defined in each account's settings. You can import the same file multiple times—for example, if you download transactions year-to-date—and existing transactions won't be duplicated. If you've made any changes to them after a previous import, those changes will be preserved. A dialog appears before and after the import with success counts, warnings, and error messages.
Before import:
After import:
Note: For sample budgets, you can import as many times as you want. Each import will recalculate transaction dates to fall within the last 90 days, but everything else will remain the same.
Edit
Click this button to open the edit window for the selected transaction. You can update its description, category, amount, and other fields. This action is only enabled when a transaction is selected.
Assign
Clicking this button opens the Assign Transactions window, where you can review uncategorized transactions and create new keywords to assign them to existing or new categories.
Split
You can split a transaction into multiple sub-transactions. This is useful when a single transaction includes multiple expenses that belong in different categories. Only imported transactions can be split. Sub-transactions appear in the list with a unique icon in the type column.
Filter
The filter button allows you to narrow down which transactions are displayed. The dropdown includes options to filter by:
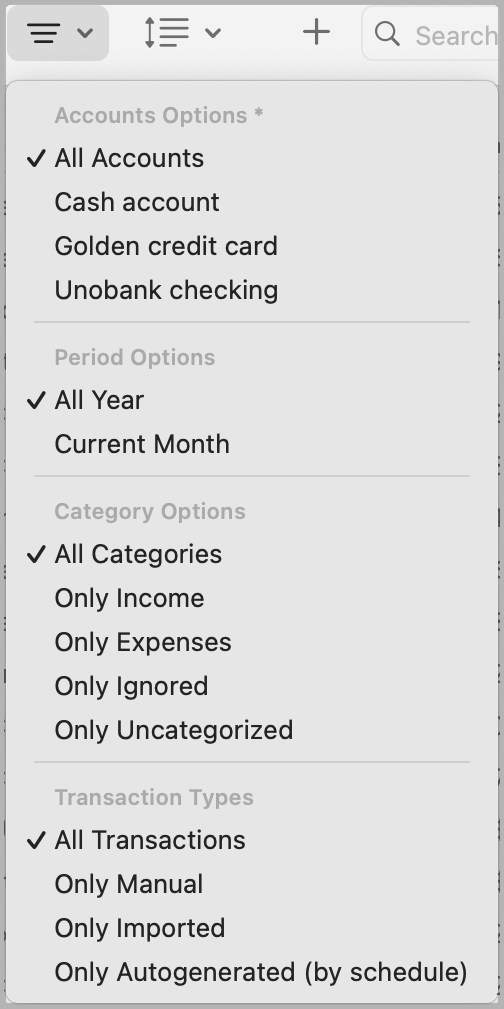
- Accounts: All accounts or a specific one.
- Period: All Year or Current Month.
- Categories: All, Only Income, Only Expenses, Only Ignored, or Only Uncategorized.
- Transaction Types: All Transactions, Only Manual, Only Imported, or Only Autogenerated (by schedule).
These filters help reduce clutter and let you focus on specific subsets of your data. Filter selections are persistent until changed.
Order
This button controls how transactions are sorted. You can sort by date or use multi-level sorting options:
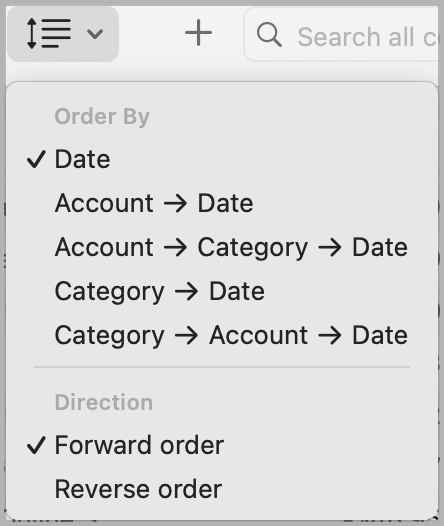
- Date
- Account → Date
- Account → Category → Date
- Category → Date
- Category → Account → Date
You can also toggle between Forward and Reverse order. Your sorting preference is remembered until changed.
Add
Click the + button to add a new manual transaction. You’ll be prompted to enter the account, date, description, amount, and assign a category.
Search
Use the search field to instantly filter transactions by any text—description, category, account, or amount. Results update in real time as you type.
Note: You don’t need to match the formatted amount exactly—just type the digits, and the app will handle the rest.