Add Scheduled Transaction
This window allows you to create a transaction that will automatically generate based on a selected repetition pattern. Scheduled transactions help automate predictable entries like salary payments, subscriptions, utility bills, or recurring transfers.
Fields
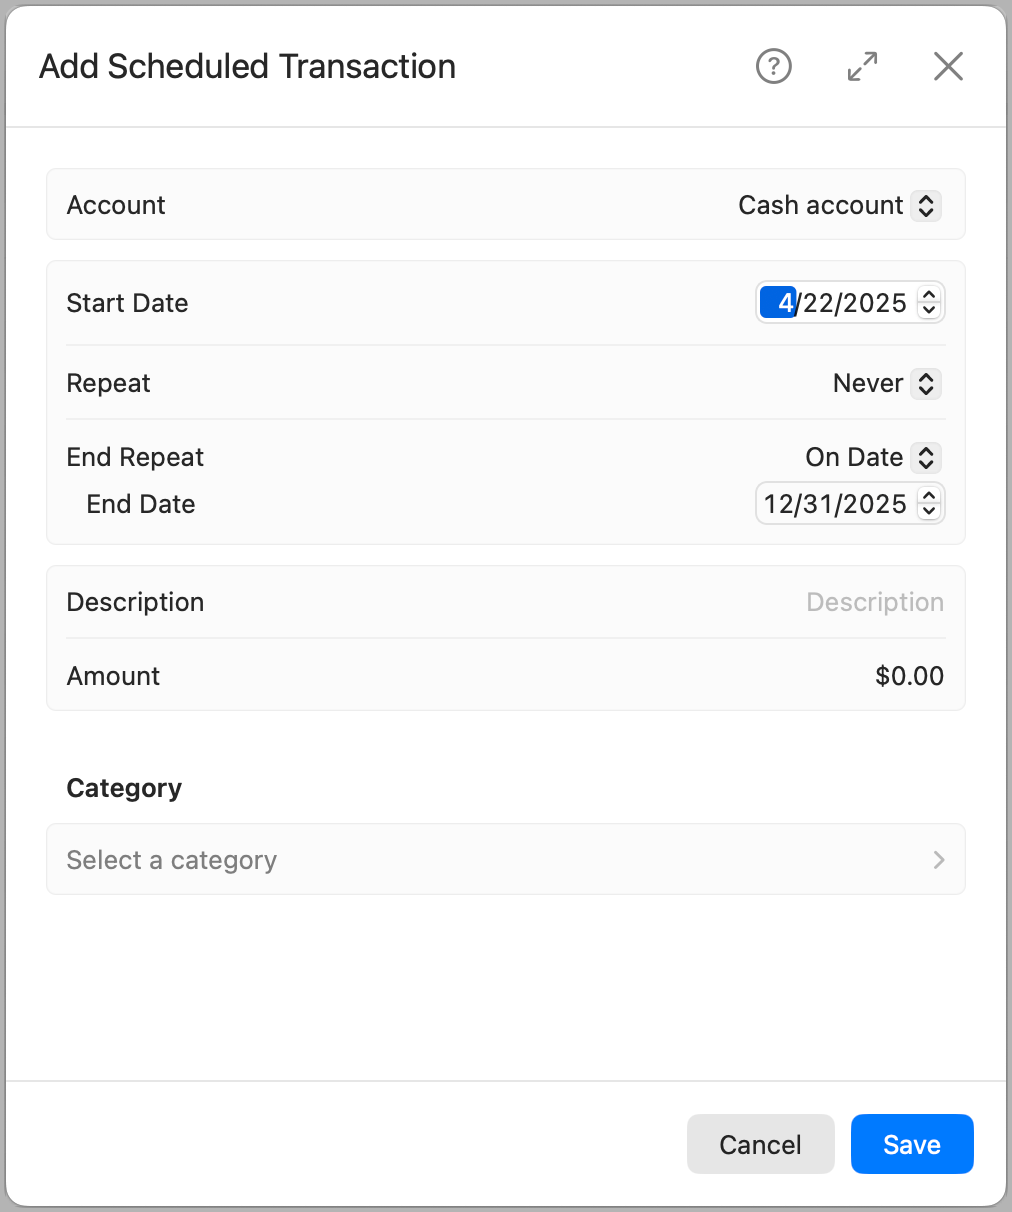
Account
Select the account where the scheduled transaction will be applied. This is the account that will be assigned to each generated transaction.
Note: Only Manual accounts can receive generated transactions.
Start Date
Defines when the transaction should begin generating. This will be the first date for which a transaction is created.
Repeat
Choose how often the transaction repeats. Available options:
- Never – Does not repeat.
- Daily – Every day.
- Weekdays – Monday through Friday only.
- Weekends – Saturday and Sunday only.
- Weekly – Once a week.
- Biweekly – Every two weeks.
- Monthly – Once a month.
- Bimonthly – Every two months.
- Every 3 Months – Once every three months.
- Every 6 Months – Once every six months.
This setting defines the interval at which transactions are generated, starting from the Start Date.
End Repeat
Controls when the schedule ends. You can choose:
- On Date – Transactions stop after a specific date.
- On Count – Transactions stop after a set number of occurrences.
This defines the total span or number of transactions to generate.
Description
The text description of the transaction. Appears in the transaction list, charts, and reports. Examples: Internet Bill, Car Insurance, Daily Coffee.
Amount
Enter the amount of the transaction. Use a negative value for expenses and a positive value for income.
This value will apply to each generated transaction unless manually adjusted later.
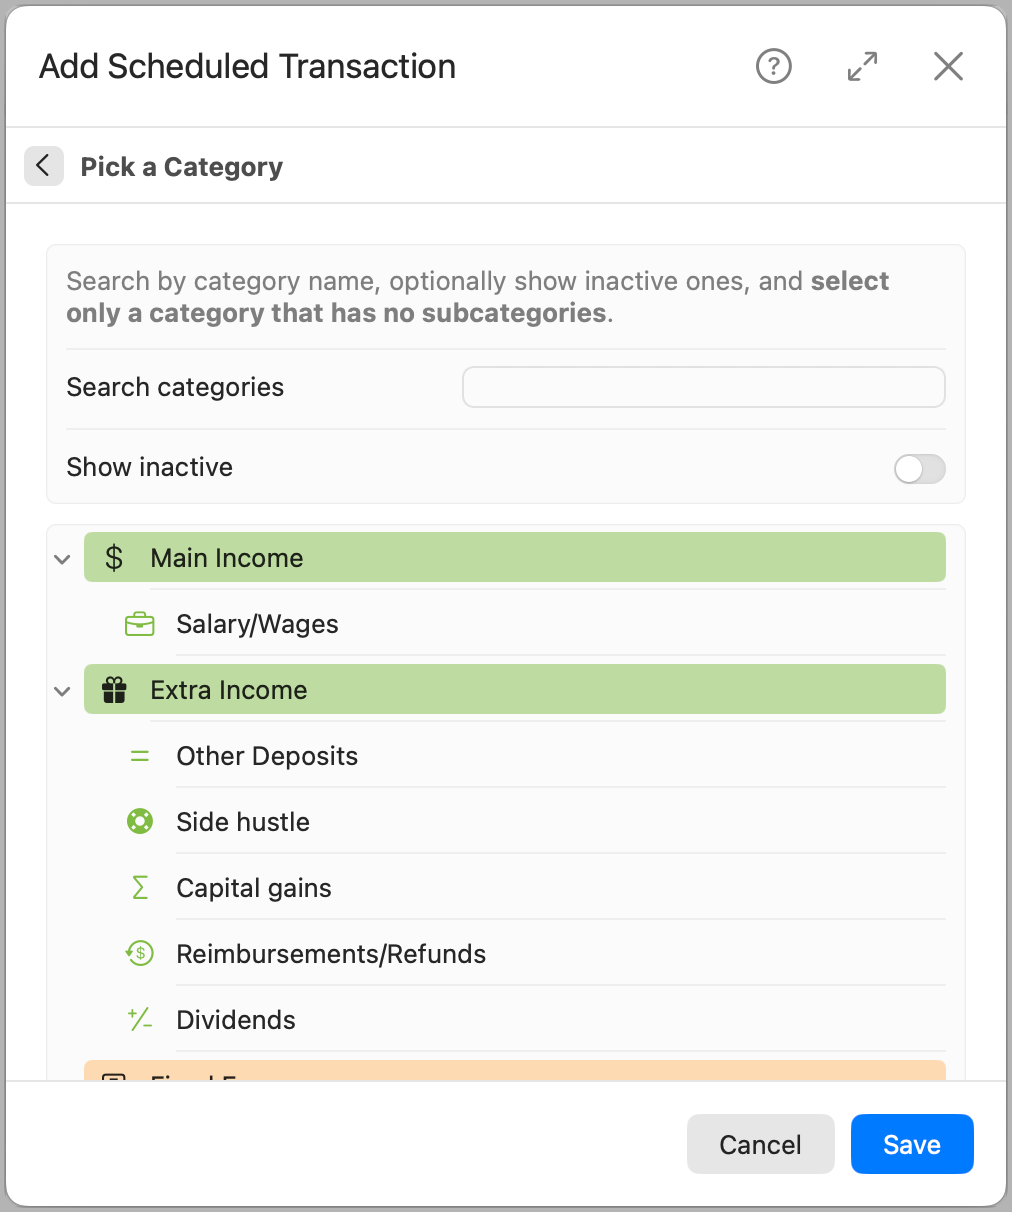
Category
Select the category to assign the transaction to. This determines how it will appear in reports, charts, and budget breakdowns.
When you click Select a category, the panel slides left to display the full category hierarchy. Only subcategories (those without children) can be selected. Once selected, the view automatically returns to the properties panel, showing the selected category and its parent, if applicable. You can also search and choose to show inactive categories. If you select an inactive category, it (along with any inactive parents) will be reactivated before saving.