Manage Auto-Import
Auto-import allows BUDGIX to automatically import transactions from files on a schedule, without manual intervention. Files must be placed at the configured location by an external process (e.g., a script, download automation, or a banking app that exports to a folder).
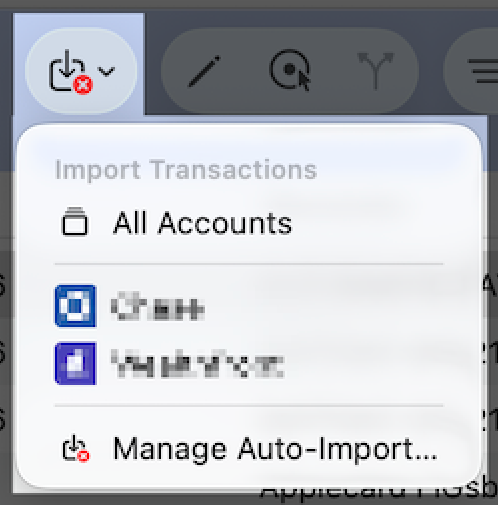
To open the Manage Auto-Import dialog, click the Import toolbar button in the Transactions screen and select “Manage Auto-Import…” from the menu.
Note: Auto-import is not available for sample budgets. The menu item will be disabled when viewing a sample budget.
How Auto-Import Works
- Auto-import runs only while the application is open, even if it is not the active window. If you quit BUDGIX, auto-import will not be triggered.
- The scheduler checks for due accounts at a regular polling interval. The scheduled time may have a delay of up to 15 minutes.
- Previously imported transactions will not be duplicated. Any changes you made to transactions after import will be preserved.
- If the Mac goes to sleep, the timer is suspended. When the Mac wakes up, the scheduler resumes and catches up on any accounts whose scheduled time passed during sleep.
Toolbar Indicator
The Import toolbar button reflects the current auto-import status for the selected budget:
- Normal state — The standard import icon is shown when all auto-import accounts are healthy or auto-import is not configured.
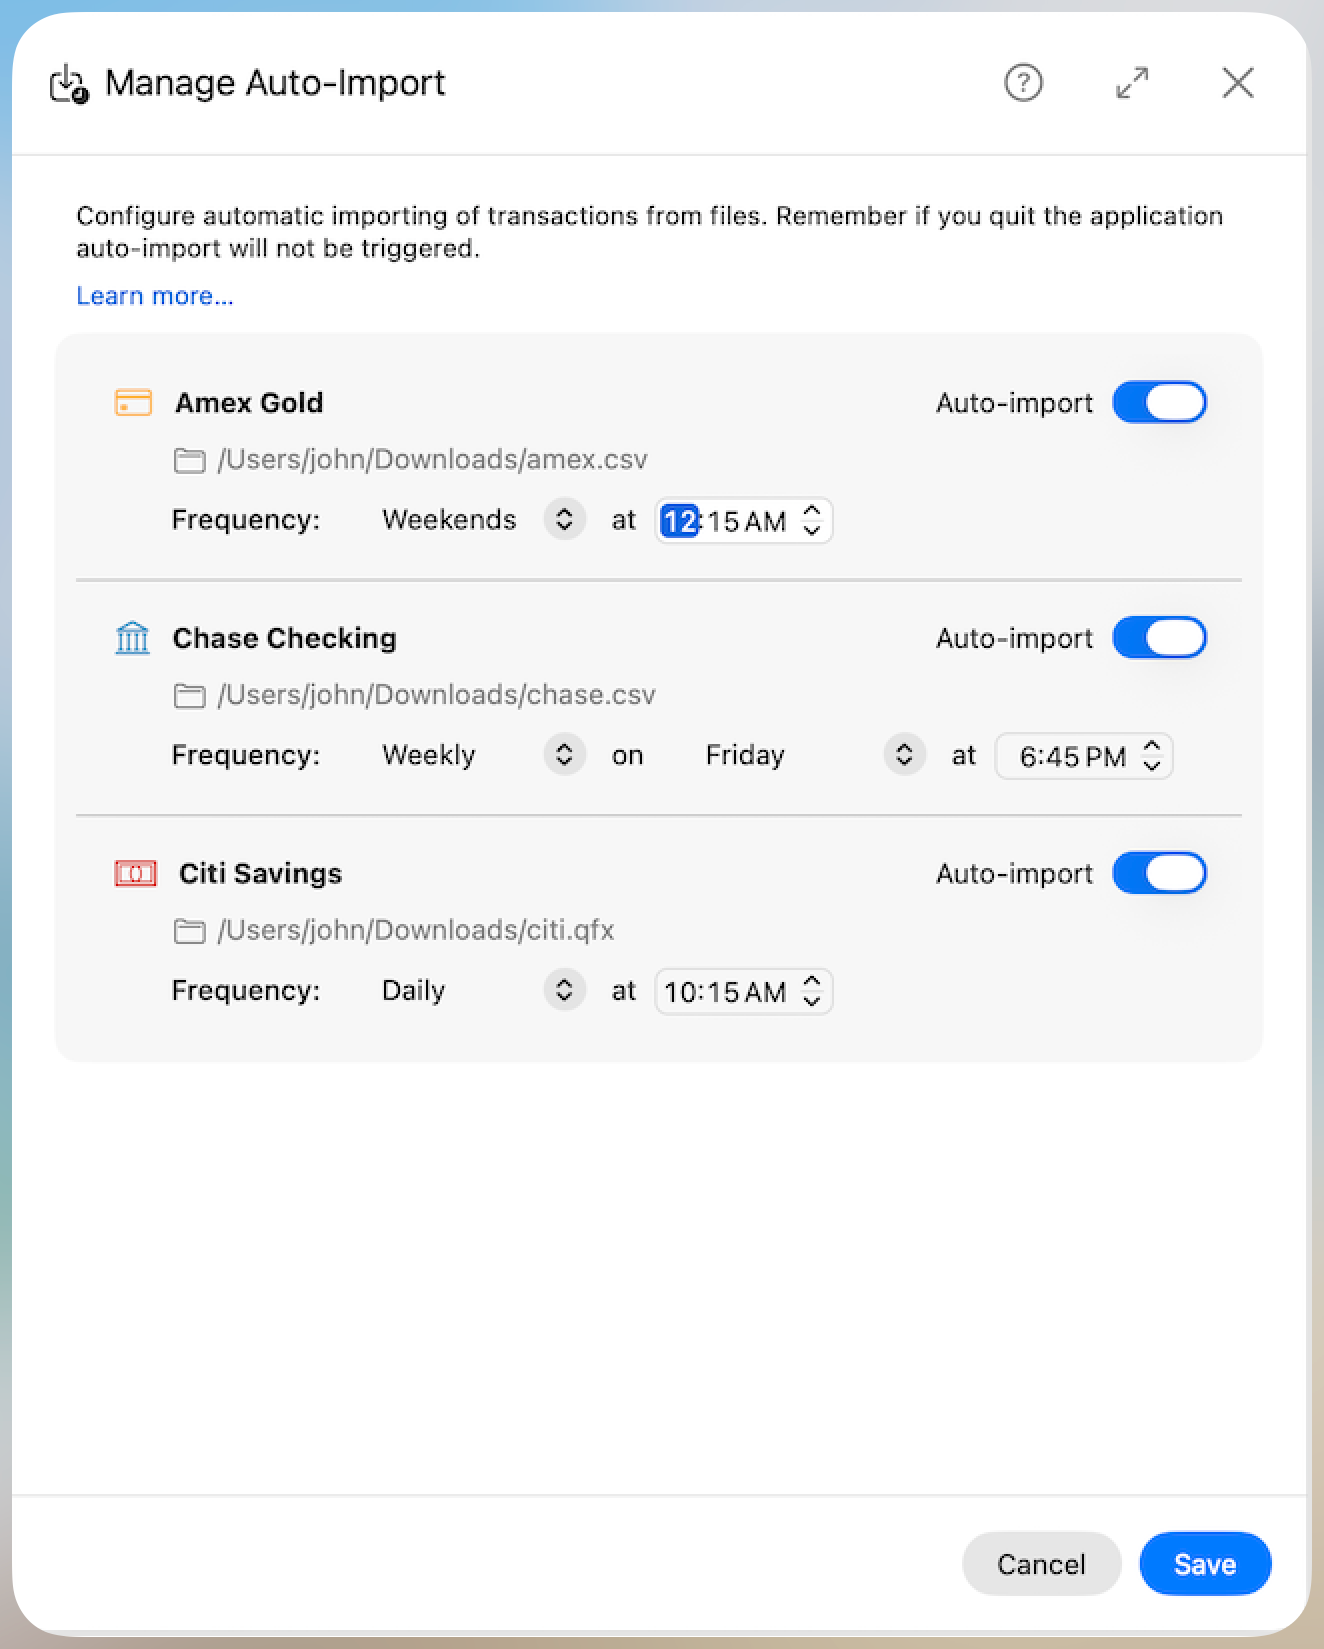
- Error state — When one or more auto-import accounts have unresolved errors, the toolbar icon changes to indicate a failure. This serves as a visual alert that attention is needed.
The error indicator is scoped to the currently selected budget. Switching to a different budget will update the indicator to reflect that budget’s auto-import status.
Configuring Auto-Import
The dialog displays all imported accounts for the currently selected budget. Each account shows its symbol, name, file path, and an Auto-import toggle.
Prerequisites
Before enabling auto-import for an account, the following must be configured in Manage Accounts:
- The account must be of the “Imported” type.
- The Transaction File Path must be set and the file must be authorized for access.
If the transaction file path is not configured, a warning message is displayed and the Auto-import toggle is disabled.
Enabling Auto-Import
Toggle the Auto-import switch to enable automatic importing for an account. Once enabled, the frequency configuration options appear.
Frequency Options
Choose how often BUDGIX should automatically import transactions for each account:
| Frequency | Description |
|---|---|
| Daily | Runs every day at the specified time. |
| Weekdays | Runs Monday through Friday at the specified time. |
| Weekends | Runs Saturday and Sunday at the specified time. |
| Weekly | Runs on a specific day of the week at the specified time. |
| Biweekly | Runs every two weeks on a specific day of the week at the specified time. |
For Weekly and Biweekly frequencies, an additional weekday picker is shown to select which day of the week the import should run.
All frequencies require a time selection. The default time is 10:00 AM.
Note: If you change the scheduled time to a later time on the same day, the import will run again when that new time is reached.
Saving and Cancelling
- Click Save to persist your changes. The scheduler will immediately re-evaluate all accounts after saving.
- Click Cancel (or close the dialog) to discard all changes and revert to the previous configuration.
Last Run Status
After an auto-import has run for an account, a Last run summary is displayed below the frequency configuration. This shows:
- The date and time of the last run.
- The result — either the number of transactions imported or “Failed” in red.
Successful Import
When an import completes successfully, the last run status shows the date, time, and the number of transactions that were imported.
Failed Import — File Authorization Expired
If the import fails because the file access authorization has expired or is missing, the error message is displayed in red along with a Reauthorize button. This typically happens when:
- The file was moved or renamed.
- The macOS user granted security authorization for the file has become stale.
- The application was reinstalled or the permissions were reset.
Click Reauthorize to grant BUDGIX access to the file again. You will be prompted to select the file. Once reauthorized, the error is cleared and auto-import will resume on the next scheduled run.
Failed Import — Other Errors
If the import fails for a reason not related to file authorization (e.g., the file format is invalid, the account has no associated budget, or an unexpected error occurred), the error message is displayed in red with a Retry button. To resolve these errors:
- Check that the transaction file exists at the configured path and is in a supported format (
CSV,OFX, orQFX). - Verify the file column mappings in Manage Accounts.
- Click Retry to clear the error and allow auto-import to run again on the next scheduled cycle.
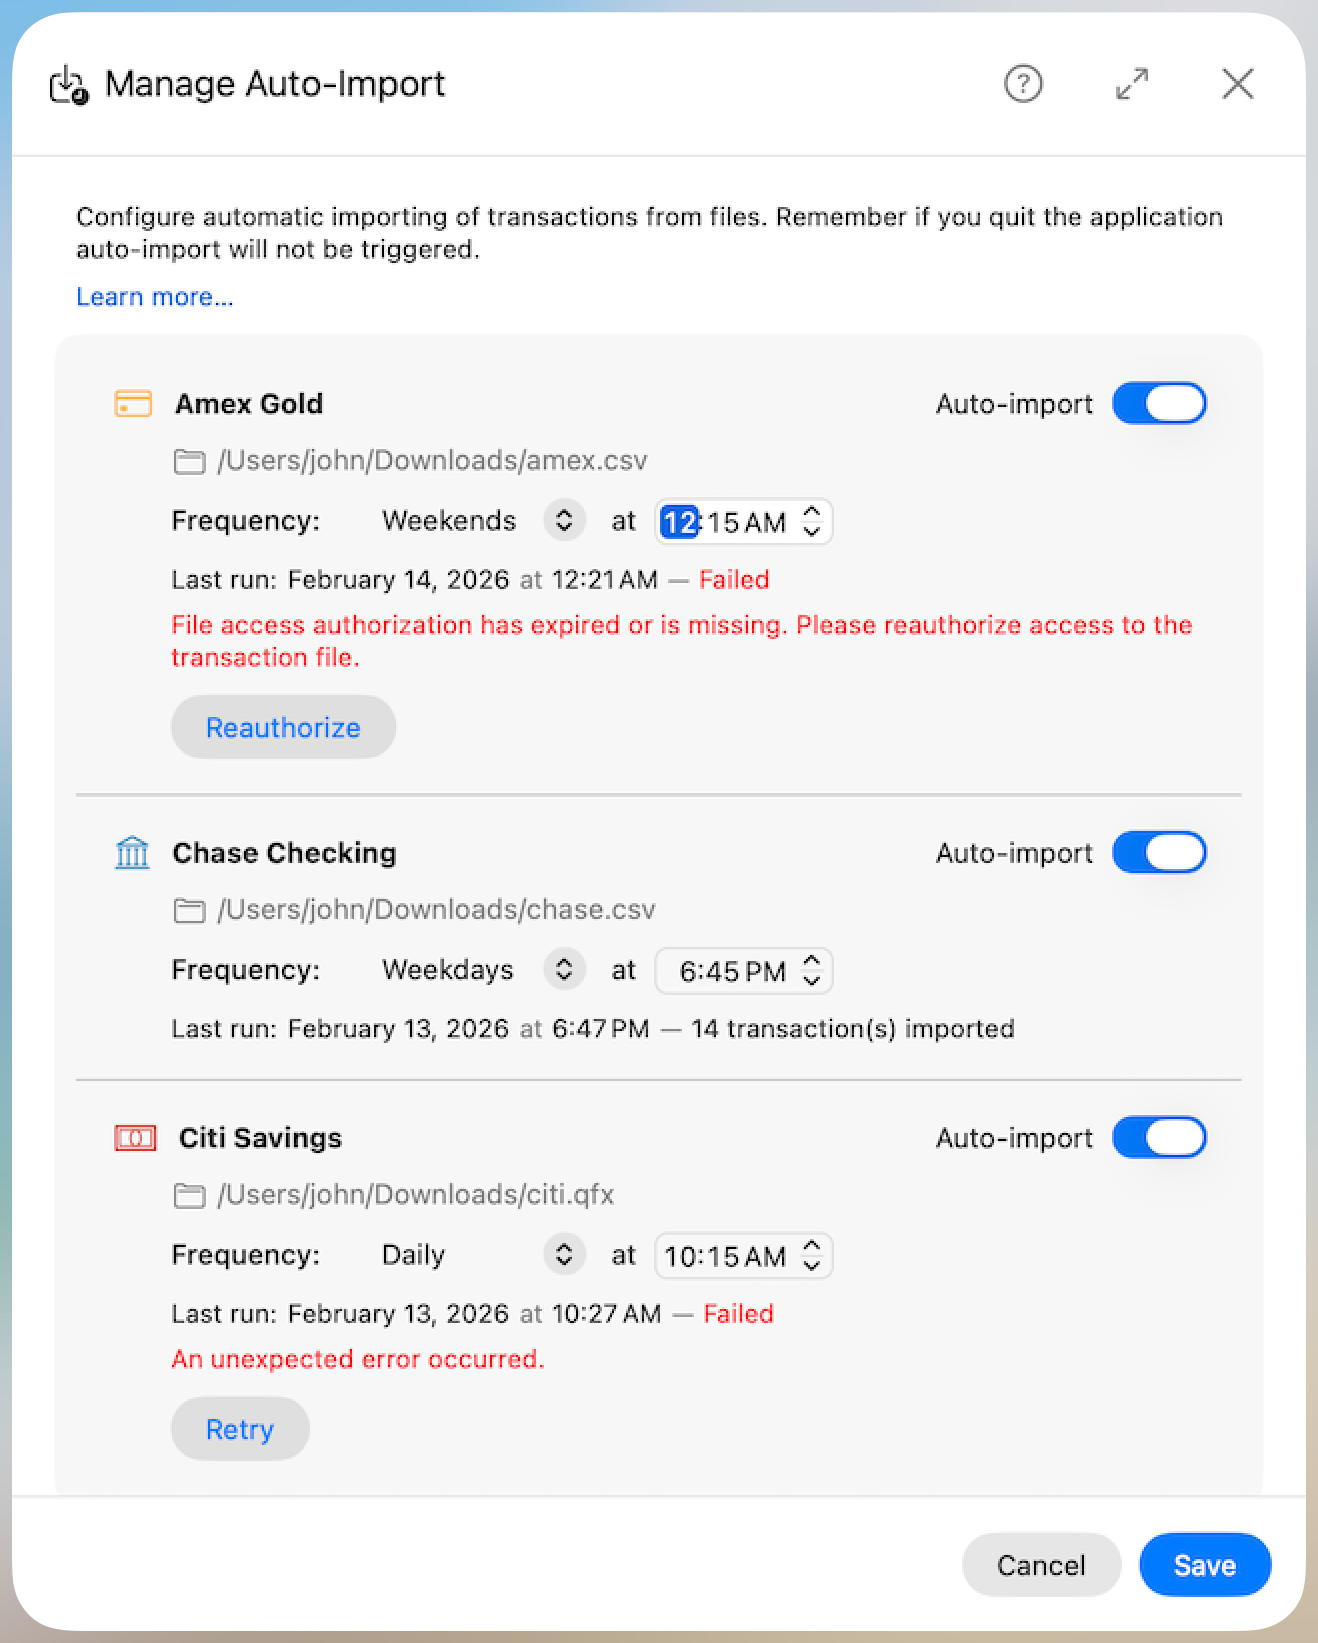
No Imported Accounts
If the current budget has no accounts with the “Imported” type, the dialog displays a message directing you to create one in Manage Accounts.
Tip: To set up a new imported account, go to your profile menu and select Manage Accounts. Add a new account, set its type to “Imported”, configure the transaction file path, and map the file columns. Then return to Manage Auto-Import to enable the schedule.